Build Connection to Bota EtherCAT F/T SensONE
It is clear that current F/T sensor device, SensONE from Bota System, is a EtherCAT version, since there’s no USB to RS422 board was provided in the package. A direct connection (connect sensor with cable and the USB2Serial adapter to a USB2.0 port) to my laptop can’t be detected by the software on the official webpage. Ok, so build a EtherCAT connection.
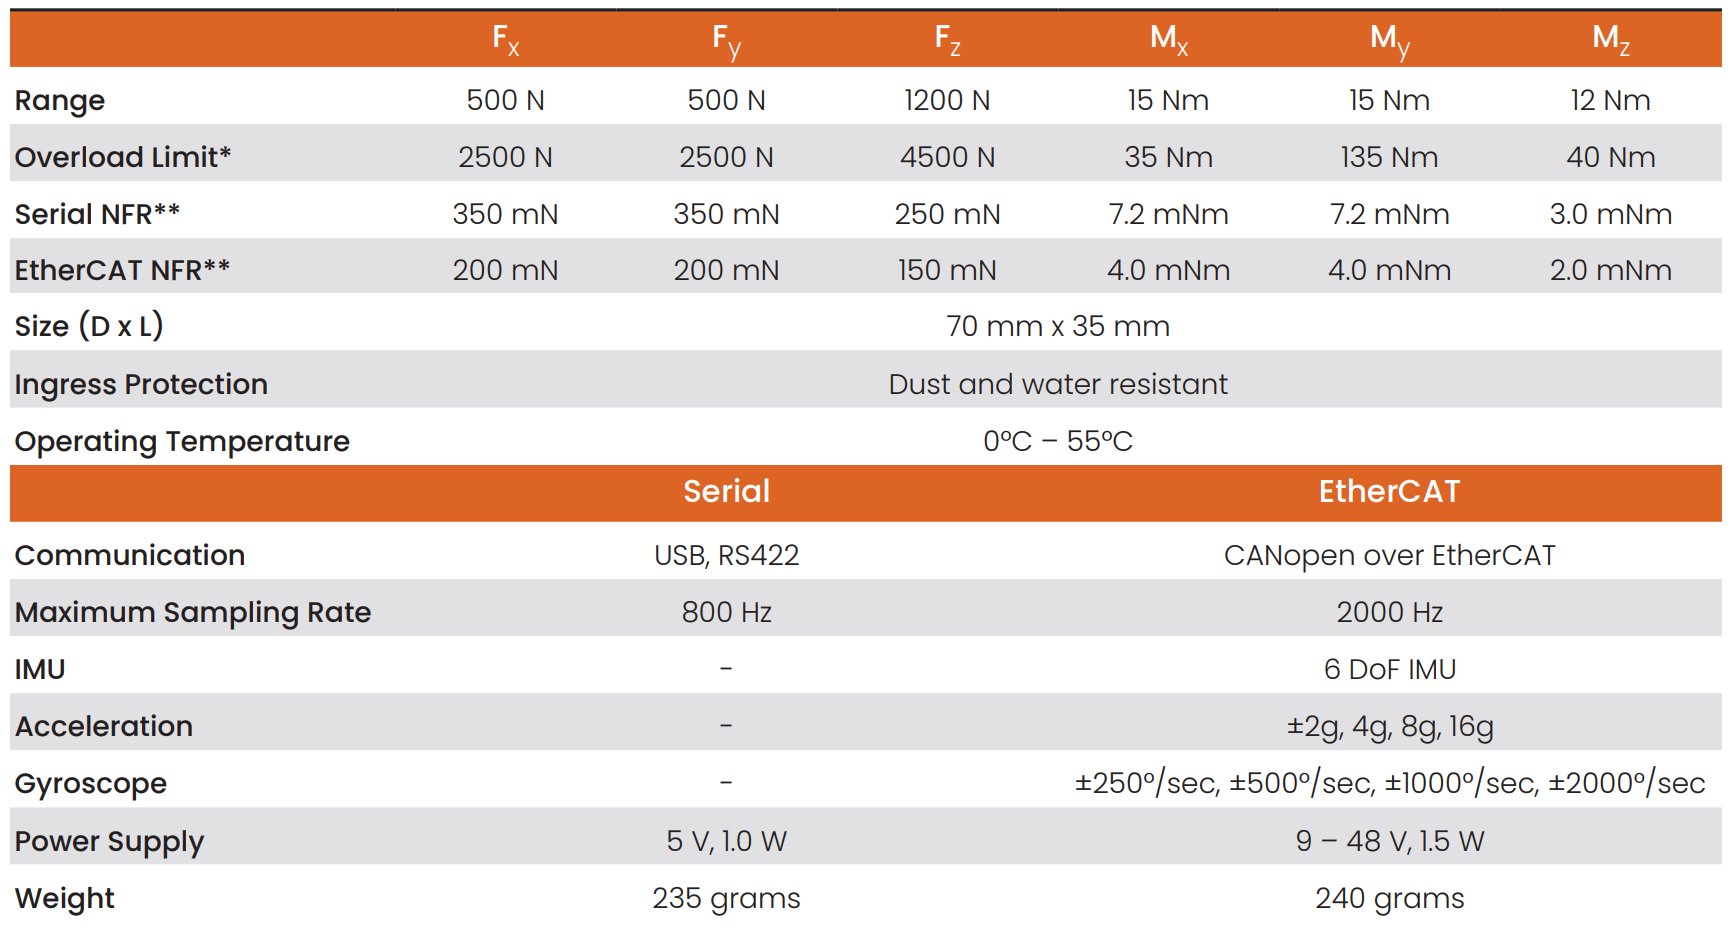
 Fig. 1 Technical specification for SensONE
I have no idea what is EtherCAT before, and there’s few materials or tutorials, so let’s try to build connection step by step. Here I list some of materials. It is not totally relevant but somehow as a potential clue to capture an overview of EtherCAT connection and how to build it.
- Meca500 - Bota systems Medusa/Rokubi Force Sensor Integration
- EasyCAT shield for Arduino
- Simple Open EtherCAT Master or SOEM
Quick Test: SensONE as a slave device
OK, so I know there’re a master and multiple slaves in a EtherCAT network, but what I don’t know is if I can build a virtual master node on PC or an external master device, like Beckhoff C6015-0010 PLC, is inevitable. However, I find an easy way to scan slave device directly from my laptop, based on EasyCAT Navigator.
 Fig. 2 Slave device, BFT-SENS-ECAT-M8 was detected which is exactly our SensONE F/T sensor
OK, I assume a virtual master node could be implemented on PC. SOEM seems to be a promising library to do that based on my recent research.
Detect SensONE device from SOEM
Prerequisite:
- ROS Noetic 1.16.0 was installed on my virtual machine, Ubuntu 20.04.5 LTS
- SOEM library was manually install from source (do not use apt-get here)
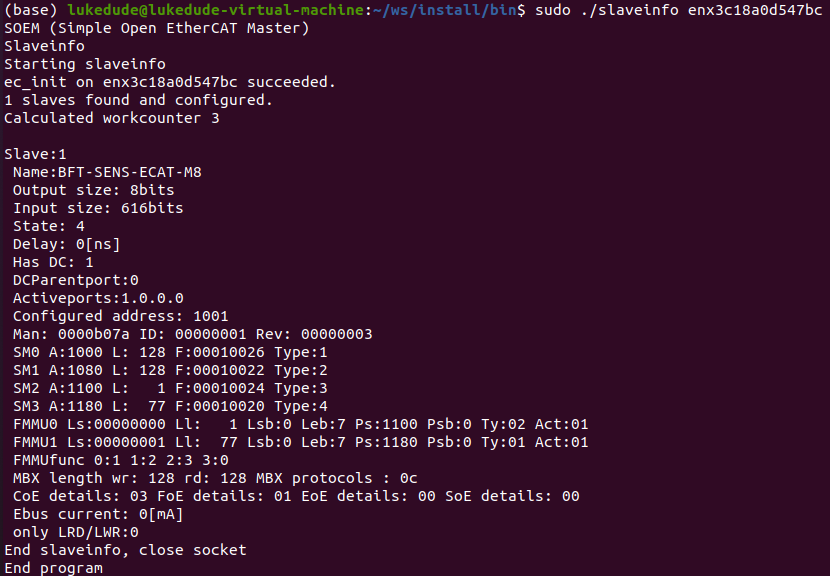
Make sure the device is properly wired to the laptop and direct to VM, check the ethernet connection on ubuntu system by ifconfig in terminal, copy the name of connection (here in my case, it is enx3c18a0d547c), enter the bin directory and query the SOEM EtherCAT master with sudo ./slaveinfo **ConnectionNameHere**. The slave device was automatically detected with its detailed information.
 Fig. 3 Ethernet connection config of slave device
 Fig. 4 Slave device detected by SOEM
Build driver and launch on ROS
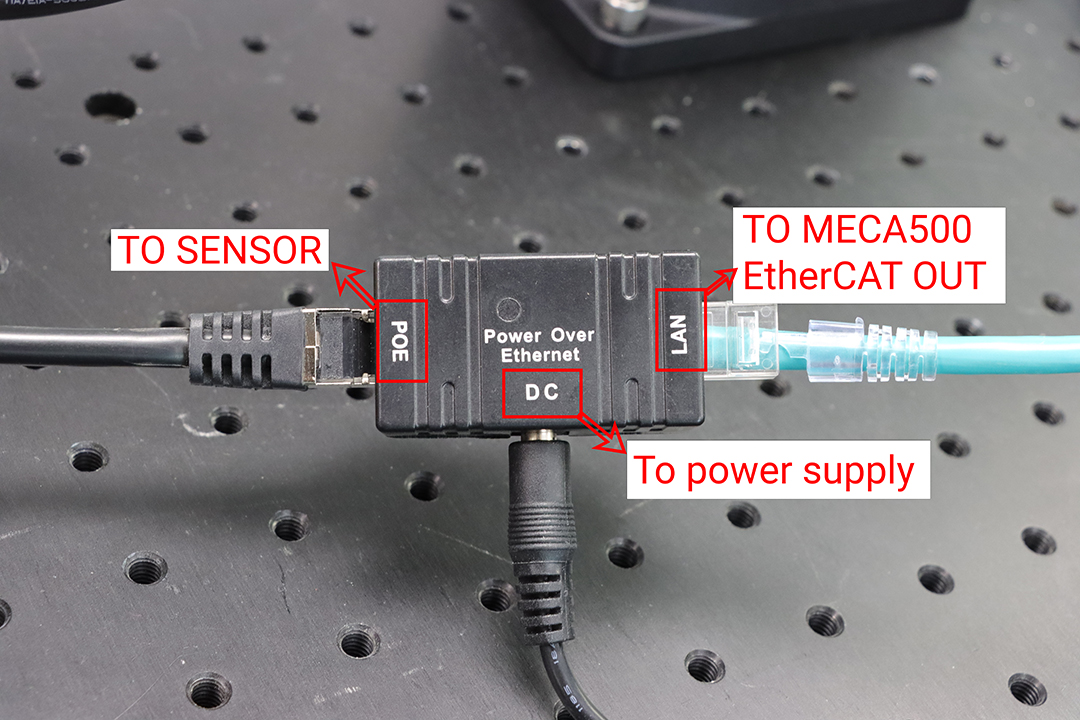
 Fig. 5 Power over ethernet connection
Ok, so both the EasyCAT of windows and SOEM of ubuntu can detect our EtherCAT sensor device. Even though I’m still a little confused about the actual function of SOEM, an open source master implemented on pc, but whatever, I’m glad to know there’s no need for an external master device. I can just skip the details and directly build driver according to the instruction from bota_driver.
Prerequisite:
- ROS Noetic 1.16.0 was installed on my virtual machine, Ubuntu 20.04.5 LTS
- SOEM library was manually install from source (do not use apt-get here)
- ethercat_grant, just directly install it via apt-get command in terminal
- force_torque_tools, there’s no branch for Noetic distro, but Kinetic or any other ROS1 branches, according to test, is totally ok to run on my distro.
Other necessary dependencies can be found on the bota_driver build instruction. Following directly from the instruction is enough. But there’s several regulation you should make after building the driver from source.
- Again, reconfigure the EtherCAT bus name according to your case. In launch file (rokubimini_ethercat.launch, use
findcommand to locate it and better to backup it), replace the value of parameterether_catwith your own connection name, which can be found byifconfigcommand in terminal. In my case, it isenx3c18a0d547clike what I found at last section. - Uncomment the
time_stepparameter, define the value according to your case.
Configuration file rokubimini_sensor.yaml can be found and used to regulate according to your need. Meanwhile, to build bota_demo, force_torque_tools is a necessary dependency to access F/T data from sensor. It must be built from source. There’s no branch specifically for ROS noetic distro, yet according to my test, the Kinect branch also works well.
📌 In my case, we were using a Bota SensONE F/T sensor, so I choose the BFT_SENS_ECAT_M8.launch as my launch file and reconfigure certain items.
